How To Grow Hollyhocks From Seeds? (SEEDS TO FLOWERS)
Growing Hollyhock Flowers By Their Seeds is Relatively Easier, Than Other Winter Flowers. & In This Post, We Will See How To Grow Hollyhocks From Seeds, With all The updates. So Lets Know Each & Every Step One By One.
When We Should Sow hollyhock Seeds?

First of all Its Extremely Important to Know, What is The Right Time To Grow Hollyhock Seeds, Proper Seasoning Is Important to Kick Start The Healthy Germination Of Seeds.
All Seeds Grow at a Specific Temperature, For Hollyhock Seeds The Ideal temperature is Around 15 to 27 degree Celsius, Between This Temperature Range, Their Seeds Will Grow Very Well.
& After Germination The Seedlings also Requires This Same Temperature Range, So Overall You Should Grow Hollyhock Seeds In The Start Of Winters, & Once The Seeds sprouts, & Became Seedlings, They Can Get Bigger & Bigger All Over The Winters.
In Cold Climate Areas, Their Seeds Can also Be Grown in Springs. But In A Temperate Region, Sowing Hollyhock Seeds In Springs, is Not a good idea, Because The Summers Heat Will Kill Your Plants, After their Germination.
Choosing Seeds?

Another Big Thing For Growing Hollyhocks From Seeds is The quality of Seeds. Hollyhock Plants Have Many Color varietes, With Single Petal Flower & Double Petal Flowers, With a Plane Color & bi Color Flowers.
So If You Are Growing These Beautiful Flowers For The First Time, Its Better To Choose a Simpler & Local Variety, Instead Of a rare & Sensitive Variety, One Even More Important Thing is the seeds Quality, Means How fresh The Seeds Are, How Good Their Germination rate Is.
Older Seeds, Means The Seeds Stored From Years, Might not Germinate Very Well. While Fresh Seeds not Germinates Well, But also Produce Healthier & Stronger Plants. From Whereever You Buy The holly hock Seeds make Sure They are Freshly Packed, & Have a Good Germination rate. Some of The Good quality Hollyhock Seeds are Also Added Here, if You Like To Buy.
Preparing the Seed Starter & Pot!

Another Part of growing seeds is your Seed Starter or soil Medium. All Soil Mixes Have different qualities, Some are Good For transplanting, Some Are Good For Growing Seeds. Seeds are Sensitive To Soil Media, Hard & Compact Mixture Will Never Ensures a Healthy Seed Germination.
The Seedlings Always have To force Their Development, so What if we Use a Mixture Where The Germination Will be Maximum, The Seedlings Grow Healthier, *& This Mixture Can Be made at Home, So You Can use this Cheap Homemade Seed Starter, Detailed Guide On This is Added Here. Otherwise Just Make Sure Your Seed starting Mix is loose, Well Draining & Soft.
For The Pot, You can Use Any Container That have frequent Space, Just Make Sure of Drainage holes, & If You Struggling Growing Seeds, Try Clay Pot This Time, They have a Lesser Chance of Overwatering. Some of The Seed Starting Containers Are Also added Here, If You Like To Buy.
Sowing The Seeds….

For Growing The Hollyhock Seeds, Make The Mixture Fully Moist First, Then Place Your Seeds Over The Soil Medium, With Proper Spacing, Leave around an Inch Of Space Between Two Seeds.

Now Cover The Seeds With a Thin layer of same Soil Or use Cocopeat, As we Know Seeds Have To Crack Out of The Soil, So Here it Shoulnot be to heavy Or Hard, so the Sprout Can Get Out. overall Cocopeat Is Best To Use Here.
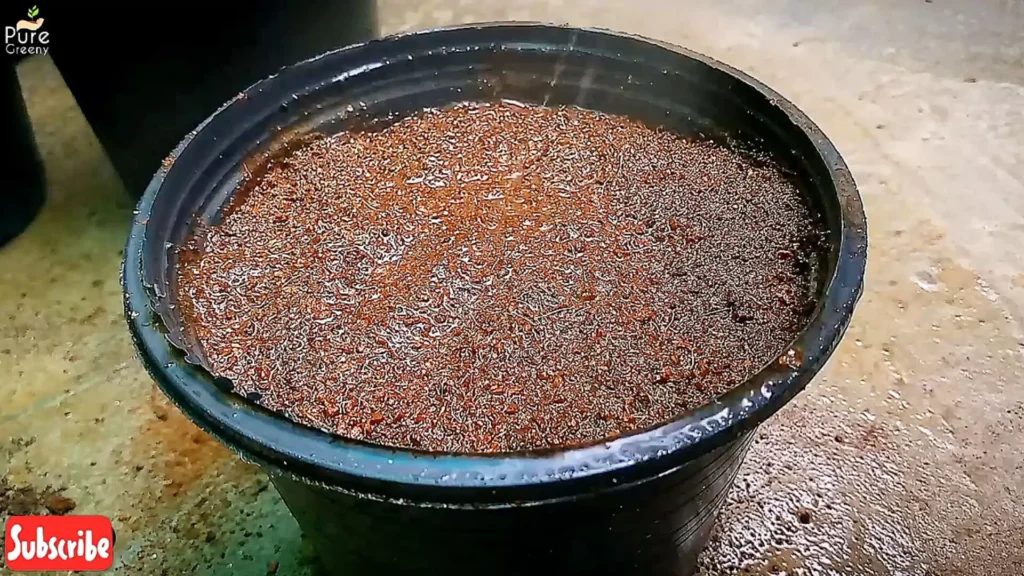
Now Use a Gentle Sprayer To Water the Upper layer. First The Out Shell of The Seeds Rots & As Some Moisture Reaches inside of the Seed, It Starts To Germinate. So here The rotting of The Outer Seed Shell is Important, That is Done By The Moisture.
I Just Mean To Say Water Very Well, First Watering Is Extremely Important For Kick Starting The Seed Germination. & Place This Pot in a Very well Lit area away From Direct Sun & Shade.
After 7 Days….(Sunlight)
After Around 5 to 7 days, The Seeds will Start pooping Out of The Soil, As Soon as You See The First Plant, make Sure The Pot is In a Bright & Well Lit Area, Sunlight is Not necessary, But Light is Important, Otherwise They will get Leggy, & May Die.

Also make Sure The Soil is Moist, Because There are Still Some Seeds Under The soil That Might Germinate, seedlings Dont Grow Exactly the Same Time, Some Grow Before & Some Later.
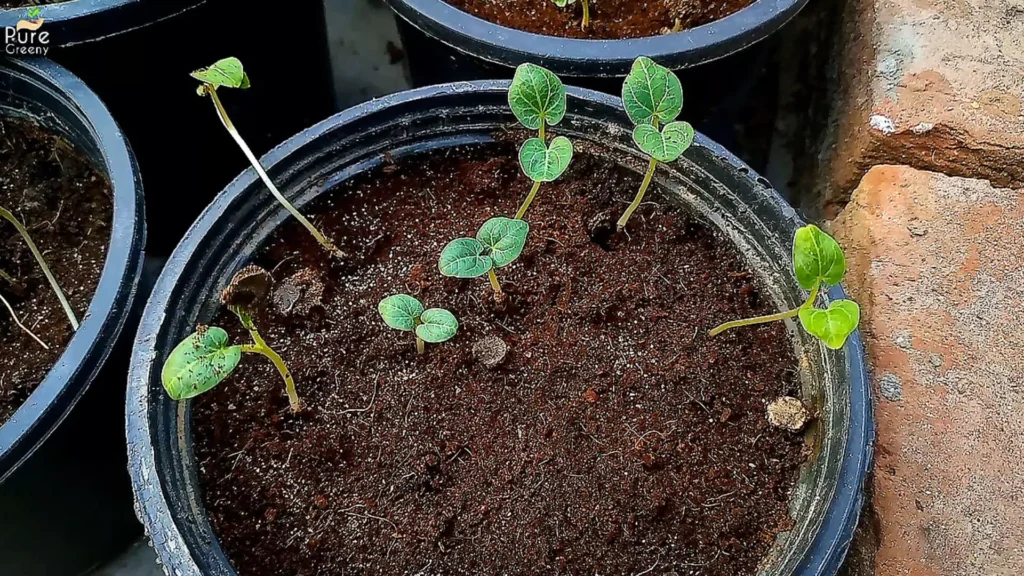
After 25 Days….(Transplant)
After around 25 days, You Can See, Our Most hollyhock Plant are Big Enought To Occupy The Whole Pot, Every seedling have a Few True leaves, Now We Can Transplant Them into Individual Pots.
For The Pot, Choose a Big Size Pot, Holly Hock Plants Are Basically grown In the Ground, But you can Easily Grow a Single Plant In a 6 to 8 Inches of Pot, Choose Either a Clay Pot or a Plastic Pot, whatever Suits You. They are also Added Here To Buy.
But For The Soil mix, As They Are Now a Complete Mature plant, So Now We Can Grow Them Into a regulat potting mix, I Have Made This Mixture At Home, Its Well Draining Soft & Loose, & It Can Be Used For Any Seasonal Flower Plant, Article On This Mixture is Added Here, if You Like To Try.

Simply get The Hollyhock seedlings Out of The Pot, Try Not To damage The Roots. So This is our First Hollyhock Plant.

Put In The Soil With Great care, Add Soil Upto The Frist True Leaf, This Will Provide Some physical Support to The Plant.
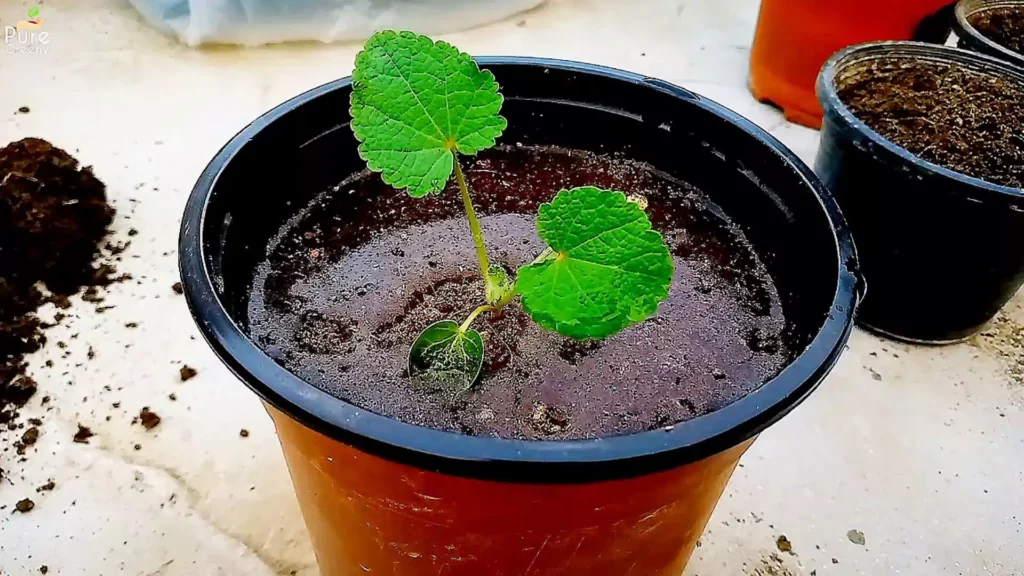
Water A Little, Just To Make The Soil Moist.
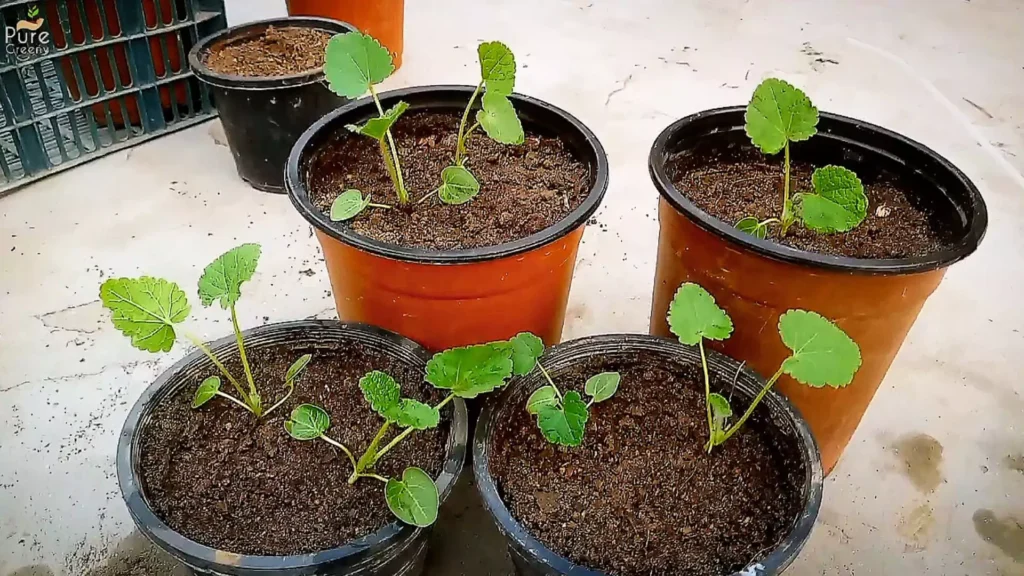
This Way Tranplant All The Plants. & Here we Have all The Hollyhock Plants. Some Are also Planted into Smaller Pots, Lets Just see what Happens With Those.
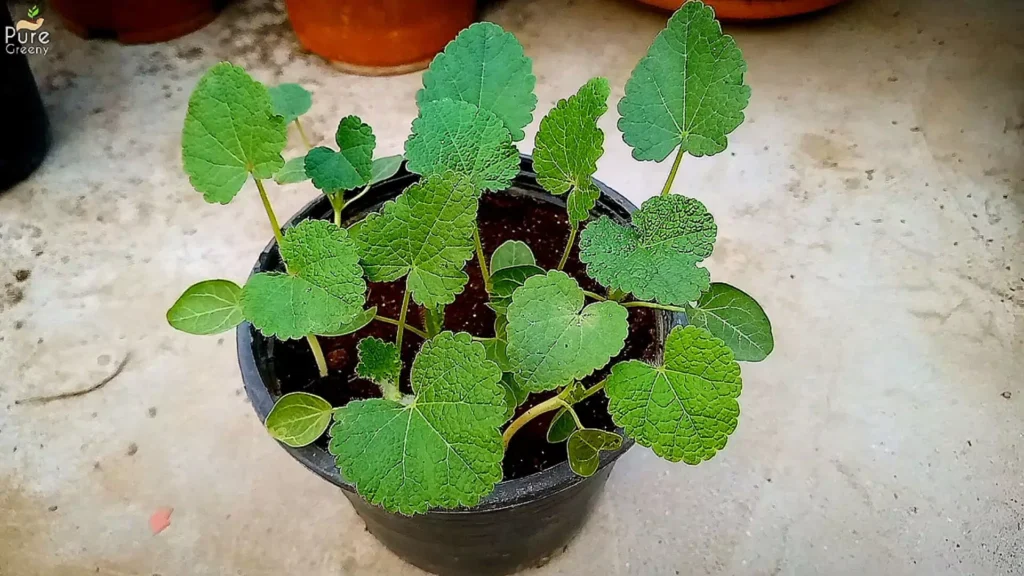
After 36 Days…

After around a Few Weeks, The Plants are Fully Stable & Growing, I Placed Them Into a Sunny Area a Few days after The Transplantation. & Now They are Growing Very Well. At This Stage, all You Have To Do Is Water carefully.
Let The Soil To Dry & then Water, & also Make Sure The Plant Recieves a Few Hours of Direct Sunlight.
After 46 Days…(fertilize)

After Around a month & Half, You Can Start Fertilizing Your Hollyhock Plants, Otherwise The Plant will Start Showing Such leaf problems. You Can Use a Nutrients Enrich, Slightly Acidic Fertilizer Atleast Twice a Month.

You can use This Homemade fertilizer, That is best For all Type of Seasonal Flowering Plants, & it Also Works Just Fine. Detailed Guide On This fertilizer is added Here. Must Checkit out & just fertilize Your Hollyhock Plants Every 2 weeks, With Any Fertilizer you have.
After 54 days….

After around a few More days, You Will See The plants Will get Bigger & Bigger, & You Might also See Some of The Flower Buds.
After 67 Days….

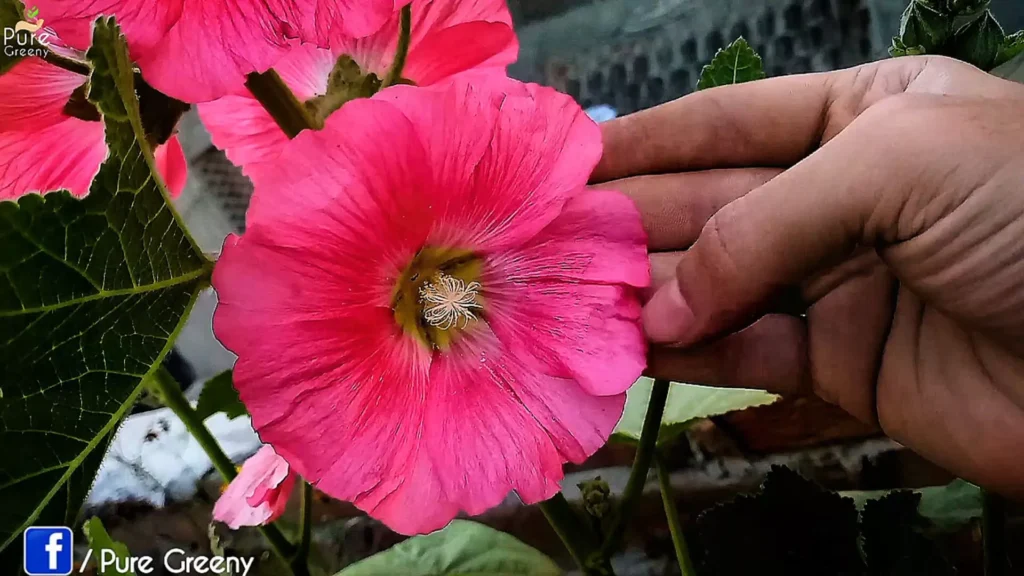
Hollyhocks Grow a single Or Some Time Multiple Flower Sticks, With Such type of Buds On It. That Will get Bigger With Time & then Bloom Time To Time. Just Keep The Plant Healthy, By Controlled watering & Exposing To a Good amount of Sunlight.
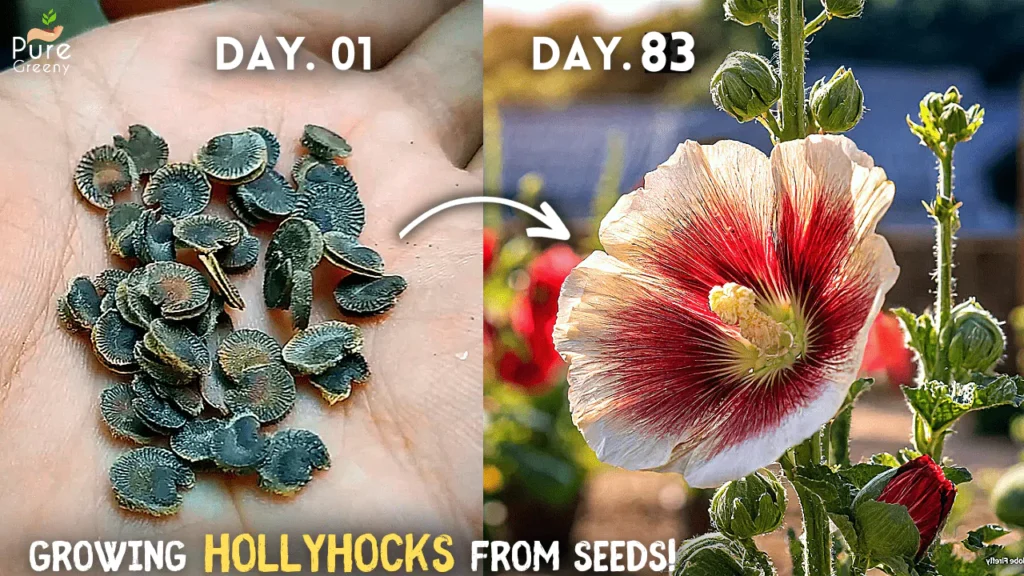
After 83 days….(Flowering Stage)

So Here We Have The First Flower of Our Hollyhock Plants, The Color Is aboslutely vibrant & Just amazing. Now The Flowers Will Keeps On Blooming Time to Time. All You Need To Do Is Water Them a Little & Enjoy Their healthy Blooms. All The Plants Are Blooming, Smaller Plants are Budding But They will Bloom To.
This Whole Flower Stage will Continue Over The Springs & Early Summers Too, as Long as The temperature Is Ideal.
After 104 Days…(Dead Heading)
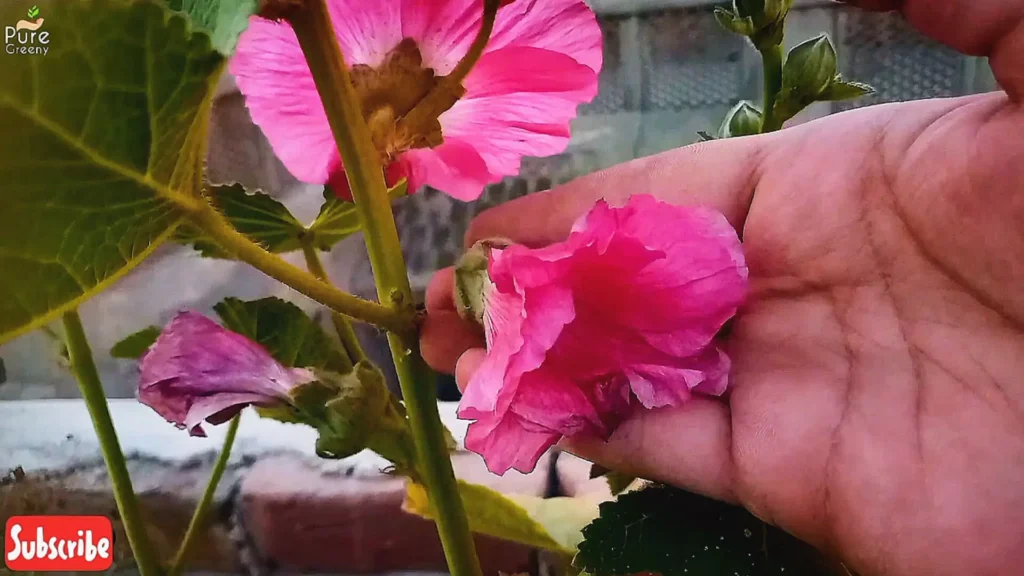
After The Blooming Of a Flower, The Petal Fell off & Such type of a Seed Pod Will Form. & This Thing Will Effect the Blooming of Other Buds, So Here You can Remove The Spent Flowers, Their Flowers Stay Fully Fresh & Bloomed For Around a few Days or a might be for a Week.

But Once They dries out, You Should Remove Them, Otherwise The other Buds Will Produce Smaller Flowers. & To Know More Such Tricks To Boost Flowering On any Plant, You Can Follow this E Book, Its Linked Here To Buy.
After 123 days….
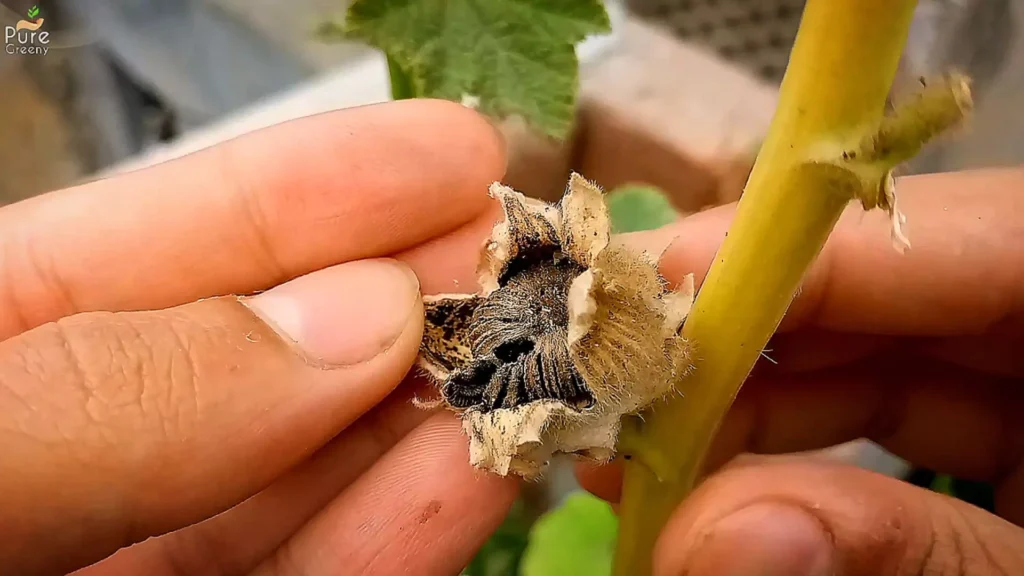
Once This Seed Pod Is Dried & Turn into Brownish Color You Can cut It Out & Open It, You Will find Such Type of seeds, That You Can Easily Store Them Into a Dark, Cool & Dry Area For The Next Season.
So Its all About How To Grow Hollyhocks from seeds, & Follow This Article To Know How You Can properly Care For Hollyhock Plants, So They produce Maximum Blooms.